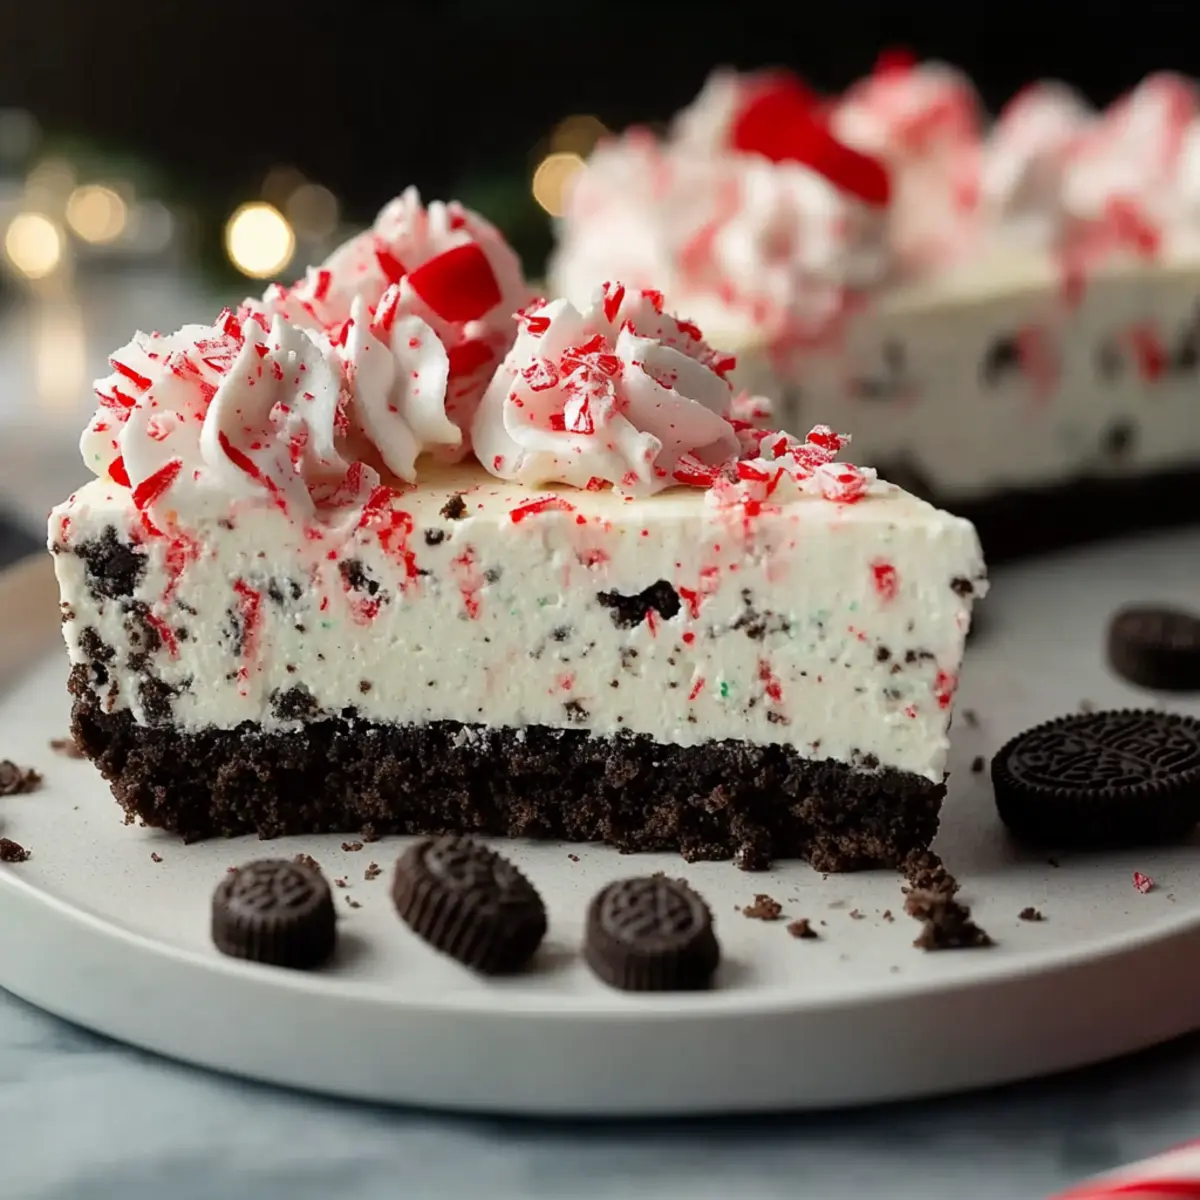
As the weather turns crisp and the holiday season approaches, there's nothing quite like the delightful blend of peppermint and chocolate to lift my spirits. Just the thought of a No-Bake Peppermint Oreo Cheesecake sends me into a swirl of nostalgia, reminding me of cozy gatherings with friends and family. The first time I served this no-bake masterpiece, I watched jaws drop and smiles spread; it's a showstopper that requires no oven time, making it perfect for busy holiday schedules.
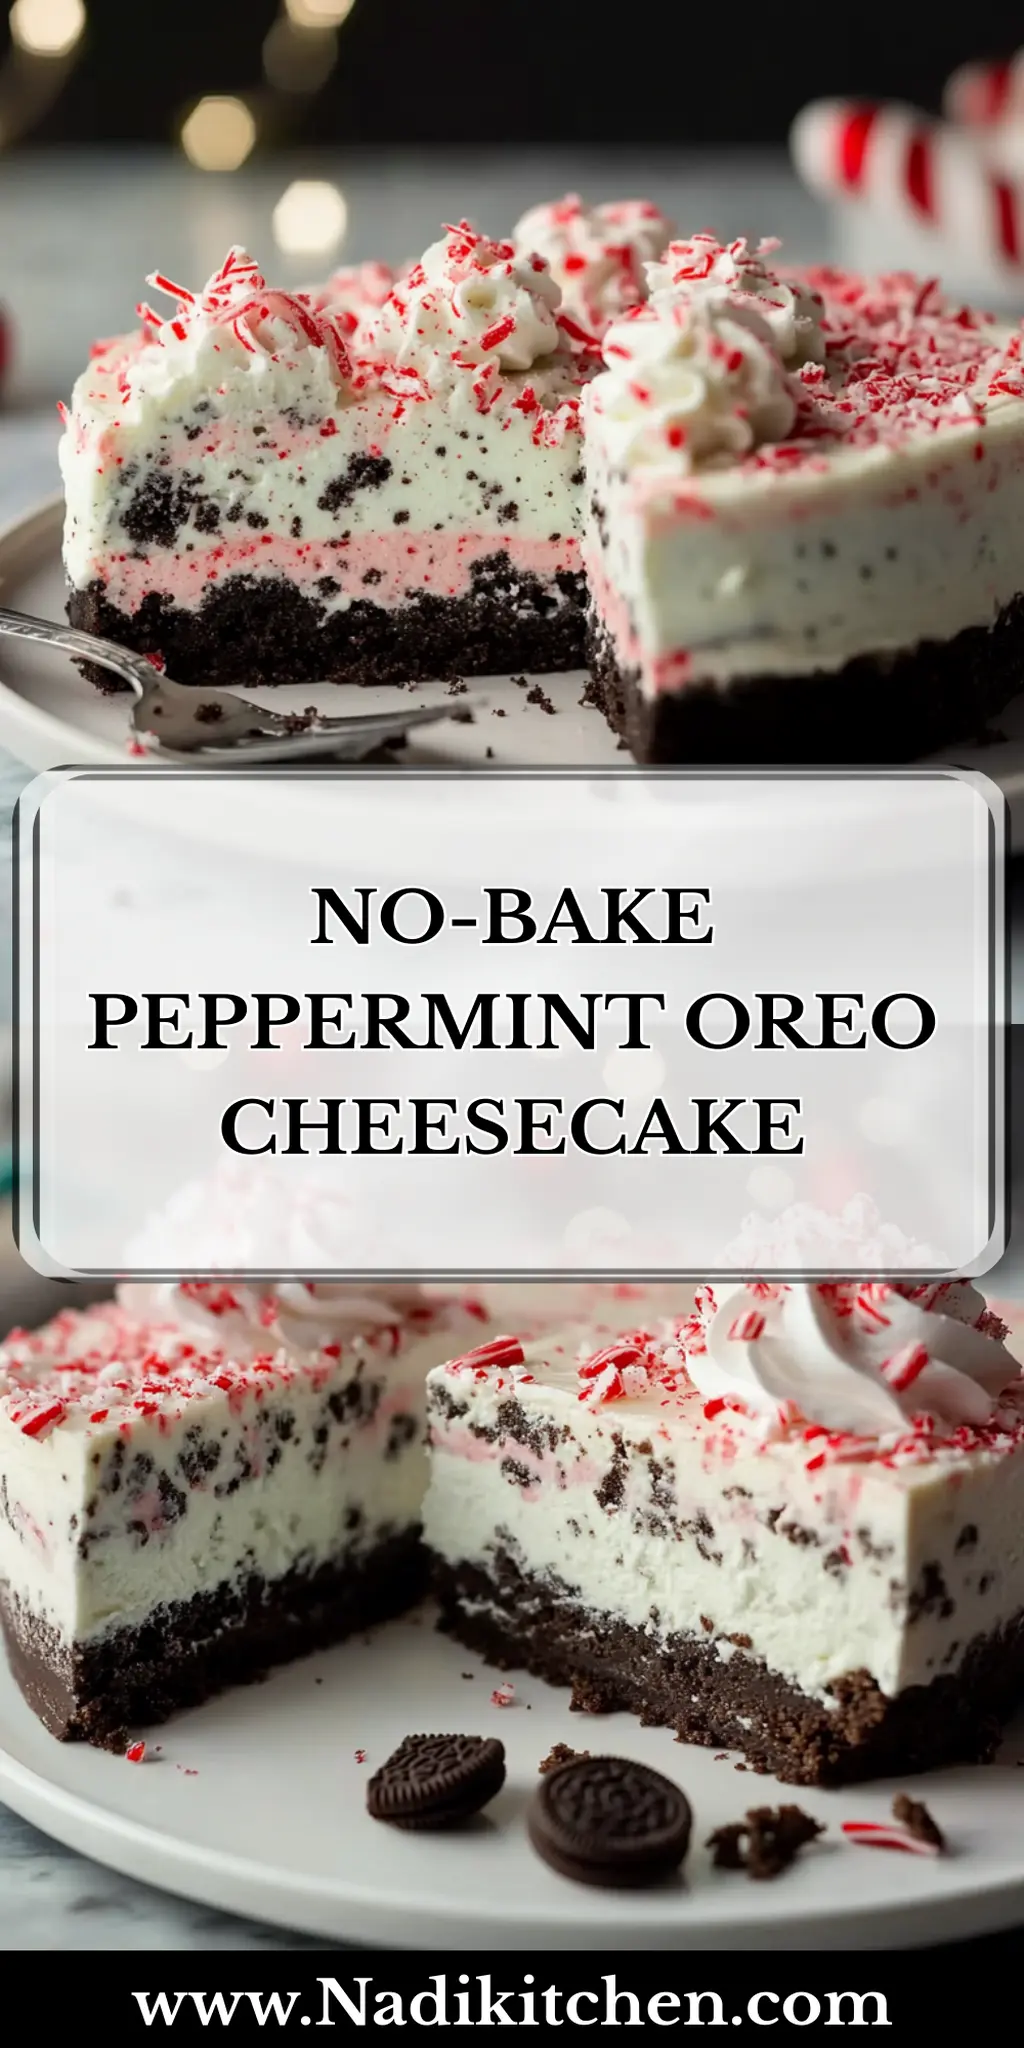
Whether you're looking to impress guests at a festive gathering or simply craving a sweet treat, this cheesecake has it all: effortless preparation, a luscious creamy texture, and that irresistible crunch from Oreo crumbles. Plus, it’s adaptable—feel free to adjust the peppermint flavor to suit your taste! With a decadent layer of whipped cream and a sprinkle of crushed candy canes on top, this dessert captures the essence of the season while allowing you to savor every bite without the fuss. Let’s dive into the recipe and create something unforgettable together!
Why You'll Love This No-Bake Peppermint Oreo Cheesecake
- This No-Bake Peppermint Oreo Cheesecake is incredibly easy to make, taking only 25 minutes of active prep time.
- The flavors of peppermint and chocolate come together flawlessly, creating a decadent treat that’s sure to impress everyone.
- It’s versatile enough to customize the peppermint intensity, so you can tailor it to your personal preference.
- Visually, it’s a stunning dessert that adds a festive touch to any gathering, complete with whipped cream and crushed candy canes on top.
No-Bake Peppermint Oreo Cheesecake Ingredients
For the Crust
• 24 Oreo cookies – these will form the base, bringing that beloved chocolate crunch and creaminess.
• 6 tablespoon unsalted butter – melted to bind the crumbs together for a sturdy crust.
For the Cheesecake Filling
• 16 oz cream cheese – softened for a smooth and creamy filling that’s easy to blend.
• 1 cup powdered sugar – adds sweetness and balances the flavors perfectly.
• 1 teaspoon vanilla extract – enhances the overall flavor profile, making it rich and delicious.
• 0.5 teaspoon peppermint extract – adjust to taste for the ideal minty freshness in your No-Bake Peppermint Oreo Cheesecake.
For the Topping
• 1.5 cups whipped topping – adds lightness and airiness to your cheesecake, ensuring a delightful texture.
• 16 Oreo cookies (chopped) – sprinkle on top for added crunch and visual appeal!
Feel free to get creative with this delicious recipe, and watch as it becomes a staple during the holiday season!
How to Make No-Bake Peppermint Oreo Cheesecake
-
Crush the Oreo cookies into fine crumbs and mix them with melted butter. This mixture should feel damp and hold together, then press it firmly into the bottom of a springform pan. Refrigerate while you prepare the filling.
-
Beat the softened cream cheese in a mixing bowl until it's completely smooth and creamy. Gradually add the powdered sugar, vanilla extract, and peppermint extract. Mix until all ingredients are well combined and the mixture is fluffy.
-
Fold in the whipped topping gently using a spatula. This step is crucial—make sure it’s light and airy, creating that perfect cheesecake texture.
-
Incorporate the chopped Oreo cookies into the cream cheese mixture, ensuring even distribution throughout. The chunks will add delightful bursts of flavor and texture to your cheesecake.
-
Spread the filling evenly over the chilled crust in the springform pan. Use a spatula to smooth the top, creating a neat and polished surface.
-
Refrigerate the cheesecake for at least 6 hours, or overnight if possible, to let it set properly. This is where the magic happens!
-
Top your cheesecake with a generous layer of whipped cream and sprinkle crushed candy canes on top just before serving for that festive touch.
Optional: Drizzle with chocolate sauce for an extra indulgent layer of flavor!
Exact quantities are listed in the recipe card below.
What to Serve with No-Bake Peppermint Oreo Cheesecake?
Indulging in a No-Bake Peppermint Oreo Cheesecake opens the door to endless possibilities for creating a lovely meal experience!
-
Classic Coffee: A rich cup of coffee perfectly balances the sweet and minty flavors of the cheesecake, highlighting its decadent layers.
-
Minted Fruit Salad: Combine fresh berries and mint for a light and refreshing salad. The vibrant colors and contrasting textures make it the ideal complement.
-
Chocolate Mousse: The creaminess of chocolate mousse adds depth to your dessert table. It's two kinds of decadence that everyone will love!
-
Hot Chocolate Bar: Set up a cozy hot chocolate station with toppings—marshmallows, whipped cream, and peppermint sticks. This playful pairing ties in well with the festive vibe.
-
Sweet Almond Biscotti: These crunchy cookies provide a delightful dip into hot drinks, enhancing the texture contrast with your cheesecake.
-
Sparkling Water with Lime: The fizz and lime's tartness refresh the palate, cleansing the taste buds between each mouthful of sweet cheesecake.
-
Apple Crisp: The warm, spiced goodness of baked apples contrasts beautifully with the cool creaminess of the cheesecake, creating a comforting experience.
-
Chocolate-Covered Pretzels: These salty-sweet delights bring a fun texture and flavor twist, making every bite a celebration of taste.
-
Peppermint Tea: Complement the peppermint notes in the cheesecake while providing a soothing end to your meal with fragrant, herbal tea.
How to Store and Freeze No-Bake Peppermint Oreo Cheesecake
Fridge: Store your No-Bake Peppermint Oreo Cheesecake in the refrigerator, tightly covered with plastic wrap or in an airtight container, for up to 5 days.
Freezer: For longer storage, freeze individual slices wrapped in plastic wrap and then foil for up to 3 months. Thaw overnight in the fridge before enjoying.
Reheating: There's no need to reheat this cheesecake—serve it chilled straight from the fridge or after thawing for the best taste and texture.
Serving: When serving, freshen up each slice with a dollop of whipped cream and a sprinkle of crushed candy canes for that festive flair!
Make Ahead Options
These No-Bake Peppermint Oreo Cheesecakes are an excellent choice for meal prep, saving you valuable time during the busy holiday season! You can prepare the crust and filling up to 24 hours in advance. First, make the crust and refrigerate it, then prepare the filling and keep it in the fridge, covered tightly to maintain freshness. When it's time to serve, simply spread the filling over the chilled crust and refrigerate for at least 6 hours or overnight if you haven’t done that already. Always top with whipped cream and crushed candy canes just before serving to ensure they remain crisp and delightful. Enjoy the ease of having this festive treat ready to impress your guests!
No-Bake Peppermint Oreo Cheesecake Variations
Feel free to let your creativity shine as you adapt this cherished cheesecake recipe to suit your taste and dietary needs!
-
Vegan: Replace cream cheese with dairy-free cream cheese and use coconut whipped cream for a plant-based delight.
For the crust, try using almond or gluten-free cookies to keep it vegan-friendly! -
Gluten-Free: Substitute regular Oreos with gluten-free Oreo cookies, ensuring everyone can enjoy this treat without tummy troubles.
Just double-check that all ingredients are certified gluten-free! -
Minty Fresh: Increase the peppermint extract to 1 teaspoon for a bolder mint flavor that packs a punch.
A touch of green food coloring can also make it visually striking! -
Chocolate Lovers: Add melted chocolate (about 4 oz) to the cream cheese mixture for a rich double-chocolate experience.
This twist creates a wonderfully decadent cheesecake! -
Fruit Infusion: Fold in crushed raspberries or chopped strawberries into the filling for a fruity burst of flavor.
The tartness complements the sweetness of the cheesecake beautifully! -
Nutty Crunch: Mix in chopped pecans or walnuts into the crust for added crunch and a nutty flavor.
This variation brings a delightful texture to every bite. -
Spicy Kick: Add a pinch of cayenne or crushed red pepper flakes to the filling for an unexpected spicy twist.
This flavor surprise contrasts fragrant mint and chocolate delightfully! -
Layered Delight: Create layers by adding a layer of fudge or caramel sauce between the crust and the cheesecake filling.
Each slice becomes an adventure in flavor that your guests will rave about!
Chef's Helpful Tips
- To achieve a perfectly smooth crust for your No-Bake Peppermint Oreo Cheesecake, make sure to crush the Oreo cookies into fine crumbs and press them firmly into the springform pan.
- Avoid over-mixing the cream cheese filling, as this can lead to a dense texture; beat just until smooth and creamy before adding the other ingredients.
- When folding in the whipped topping, use a gentle motion to maintain the lightness and fluffiness of the mixture.
- Remember to refrigerate the cheesecake for at least 6 hours to ensure it sets properly, and the longer you leave it, the better the flavors meld together.
No-Bake Peppermint Oreo Cheesecake Recipe FAQs
How do I select the right Oreos for the crust?
Absolutely! Make sure to use regular Oreo cookies for a classic flavor and texture. Look for Oreos that are fresh—avoid any with dark spots or a stale smell. If you prefer, you can switch up the flavor by using mint-flavored Oreos for an extra minty punch!
How should I store the No-Bake Peppermint Oreo Cheesecake in the fridge?
Very easily! Store your cheesecake tightly covered with plastic wrap or in an airtight container. This will keep it fresh and delicious for up to 5 days. Just be sure it’s fully set before covering to prevent any condensation that might spoil the topping!
Can I freeze my No-Bake Peppermint Oreo Cheesecake?
Absolutely! For longer storage, slice your cheesecake and wrap individual portions tightly in plastic wrap followed by aluminum foil. This will protect it against freezer burn. It can be stored for up to 3 months—just let it thaw overnight in the fridge before serving. The texture remains creamy, and the flavors still shine!
What if my cream cheese mixture is too lumpy?
If you encounter a lumpy cream cheese mixture, it's likely that the cream cheese wasn't soft enough. Be sure to let it soften at room temperature for about 30 minutes before mixing. If the lumps persist, beat the mixture a bit longer until smooth, but be careful not to over-mix to keep it airy!
Are there any dietary considerations for this cheesecake?
If you want to make it gluten-free, you can substitute the regular Oreos with gluten-free Oreo cookies without losing any of that crunchy deliciousness. For those with dairy allergies, try using a vegan cream cheese and coconut whipped topping for a dairy-free version—it works wonderfully!
Feel free to customize this No-Bake Peppermint Oreo Cheesecake to suit your needs, and enjoy the festive flavors with peace of mind!
No-Bake Peppermint Oreo Cheesecake
Ingredients
Equipment
Method
- Crush the Oreo cookies into fine crumbs and mix them with melted butter. Press it firmly into the bottom of a springform pan. Refrigerate while you prepare the filling.
- Beat the softened cream cheese in a mixing bowl until smooth. Gradually add powdered sugar, vanilla extract, and peppermint extract, mixing until fluffy.
- Fold in the whipped topping gently using a spatula to maintain the lightness.
- Incorporate the chopped Oreo cookies into the cream cheese mixture for even distribution.
- Spread the filling evenly over the chilled crust, smoothing the top.
- Refrigerate the cheesecake for at least 6 hours, or overnight, to set.
- Top with whipped cream and sprinkle crushed candy canes just before serving.
Leave a Reply